1st Grow - ILGM Super Lemon Haze - Few Newbie Questions

Strain; ILGM Super Lemon Haze (SLH) fem, photo

Soil: Start in FFHF pint starter pots, then transplant to 1gal fabric pots, bottom half FFOF, top FFHF; to be transplanted to final 5gal fabric pots

System type ? Indoor, small tent, small height, soil

PH of runoff: Have not measured runoff yet due to size; not watering to sufficient runoff to test. Being watered with PH’d tap water, gassed for 24hrs PH’d to 6.40 PPM 170
What is strength of nutrient mix? FF trio purchased, but no nutrients yet

Indoor

Light system, size? 2 LED Dimgogo “1500W equivalent” lights; 265W draw. Tent was originally 5x5’ but modified to 4x5x5. Grow space is not optimal, hard to reach, can’t close the tent all the way but the room is light-tight and previously used for growing. They’re getting 18/6 lighting.

Temps; seems kind of high 88 - 71 degrees

Humidity; seems kind of low? 38 - 61

Ventilation system; 4inch 190CFM fan/filter pulling out to the same room; tent door cannot be fully closed due to location. Vents open at the bottom of the tent. No, intake fans. (2) 6" fans running in tent.

AC, Humidifier, De-humidifier, No, I’m really out of electrical outlets

Co2; Prior to reading on the board, I’d bought an ExHale bag; due to my high temps, I just threw it in the tent.

A little background, not a huge smoker (used to be); now more prefer concentrated oil to vape sparingly to control anxiety mainly but also depression. Small amounts, typically not to get high. Though, I still do socially or for “special events”. OH is not legal yet. Tired of the black market; always wanted to try to grow and haven’t had the opportunity until now. I’ve been viewing this forum for a month or more, mostly a lurker. Feel like I know some of you guys; this is a very friendly, respectful, supportive and knowledgeable forum. Any insight will be welcome. Criticism, kudos, whatever. I don’t know shit. I’ll try to research and do the work before panicking over anything. I have kind of a limited kind of situation, so I’m not gonna be able to make everything perfect and ideal.

So, I finally ordered some seeds 10xSLH; payment a breeze, service very little touch as expected (just enough), delivery was prompt, about 10 days. Highly disappointed after receiving seeds as I only had ONE dark seed. They were all very small (maybe the strain), but they were really light colored and some really almost white. I didn’t feel the seeds were viable looking at them.

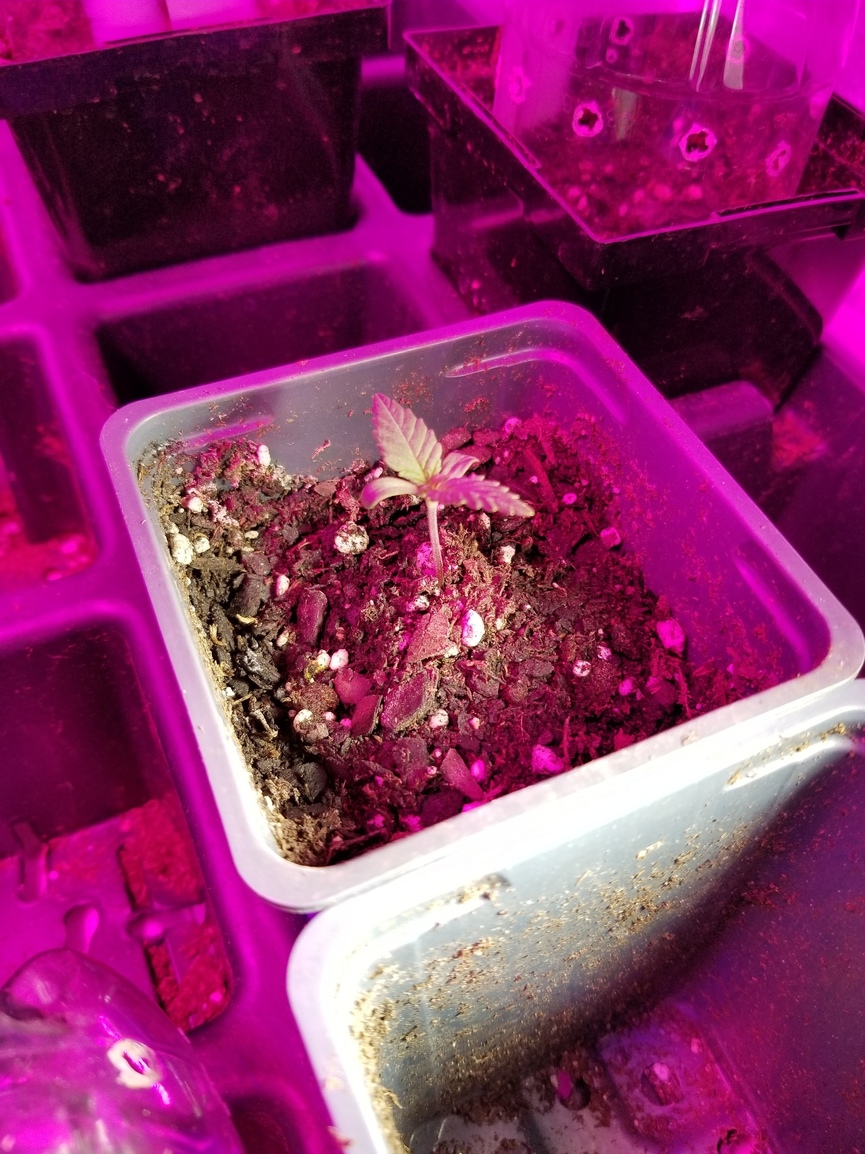
Germination issues: !@#$, this stage (which seems it should be the simplest) just really seems to keep tripping me up. 1st set, I started the 3 darkest/strongest looking in a glass of tapwater for 48hr, all 3 cracked. White visible. I moved to paper towels over a heatmat. Very hard to maintain moisture, but I got taproots on all 3, the big dark seed (we’ll call her SLH1) was the best. Put them in some Jiffy peat pods with the humidity dome over and heatmat under. Only the strongest looking seed (SLH1) survived. Watering was just misting and misting the dome. So, SLH1 proceeded. I planted them all lil 1PINT starter pots that I had available on 6/1, so I’m call that her bday. I replanted the other two in the starter pots hoping, but no. 6/6 I soaked 3 more SLH seeds. ALL 3 CRACKED. This time I skipped the peat pods, heating mat and paper towel; dropped immediately into FFHF 1pint starters with homemade “humidity domes” but I think i put too many holes in them. This time 2/3 have sprouted up. I want 3 big plants in this lil tent, so this is kinda ideal. I still kinda question my seeds a bit, but it’s worked out and the FACT is, all of em LOOKED weak, only 3/6 survived, BUT 6/6 CRACKED in water, so they were VIABLE. That means in my newbie inexperience, I killed them; I will not start an issue or ask for replacements. Personally, I think SLH1 looks particularly hearty and healthy. Sorry for the quality of the pics, I tried to shine a lil white shop light on them.

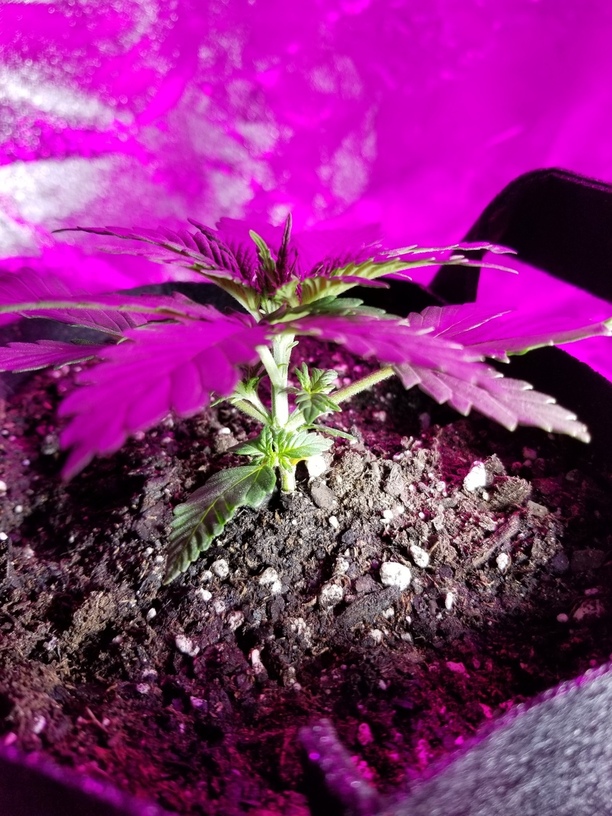
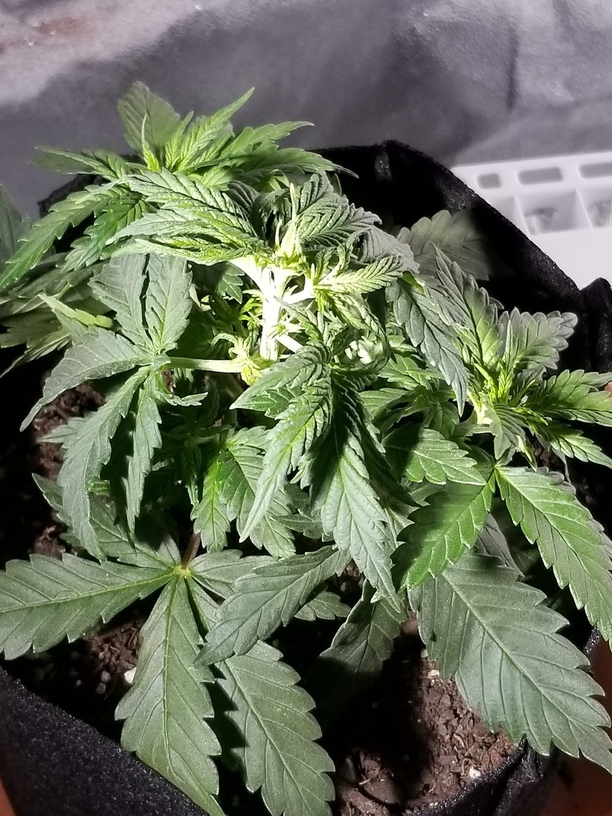
I have a couple questions on the SLH1 though. 5th node was just sprouting up and I made an attempt at a FIM. She was transplanted from the pint container on Wed 6/14 (yesterday) into the 1gal fabric. At transplant, roots visible thru bottom and around the corners. No visible shock today, I did not disturb the root/soil ball at all and just placed it with the shape of the pot intact. Visible growth today before the FIM. Did add mykos for root stimulation both when putting into the pint and yesterday’s gallon fabric pot. My question is really just how she is growing. It looks like at every node I’m getting multiple stems/branches? They started with just leaves. Isn’t that what we are trying to attempt to train in with FIM/Topping? Is she just doing it by herself?

2 Likes

your plants are looking great, nothing to worry about. Some nice side branches are starting to grow. You will have to solve your tent door opening/closing well before you start to flower as your dark period must be totally dark and uninterrupted. Good job on the transplanting.

3 Likes

thanks @mountainman1; yes the room is pretty light tight though. I can/will be zipping the tent up when we go flower to make sure. It’s essentially just a storage room in the basement. There’s really no fix, just a poor space/placement of the “door” on the tent vs. the physical door to the room. I rent this place with no intention of purchase later, so no heavy modifications can really be done. Kinda why i said, I can’t quite get it to ideal conditions. It’ll be perfect dark for flower though; I understand the importance. Thanks for the feedback man.

1 Like

I agree. Your plants look great. Mine are about the same age, and nowhere near ready for topping or fimming. You’re doing a great job. Good luck!

1 Like

I’d kill to have my plants look this good when they are that age. I never get through this part without screwing them up.

Okay maybe not kill… that’s hyperbolic. But I’d sacrifice a goat or something.

4 Likes

Well, I did manage to kill 3/6 in this stage myself lol. The oldest one seems to be coming along well though and the two seedlings look to off to a good start.

Thanks everyone for the encouragement.

1 Like

The ones that made it look great!
Your on the right track :+1:

1 Like

Disclaimer: I have not read any replies to this topic. I am just giving my reply. Happy growing :slight_smile:

It sounds like you just kept the first batch too wet. Also; You handled those sprouts 3xs. Not a good idea. Best to place them in a starter cube, peat pot, etc, either right from tyhe start, or omitting the paper towel. I always use 1.5" rockwol cubes and get as close to 100% as I would dare claim in propagation success. I will show you a pik. I use these starter cubes for seeds and clones and they provide an awesome foundation for a strong plant.

https://www.amazon.com/Grodan-Rockwool-Mini-Blocks-Pack/dp/B00XQECROY/ref=sr_1_5?ie=UTF8&qid=1?tag=greenrel-20

Following a simple regimen produces the most excellent hassle and hands free propagation method. Hope you do not mind me posting some piks.

Notice the bump. That is a small tuft from the corner of the cube I gently place over seed hole in order to force the roots to take hold.

A couple seeds popped through

2-3 days: Almost all are thriving.

100% healthy

Week to 10 days

Another one - week to 10 days

It is important to invest in a T5 2’ 4 bulb lamp like this for propagation and early veg. Notice the lamp only 2" from top of seedlings. A 4" fan should also be blowing across this space in order to strengthen the stems. Temps 75-85f
https://www.amazon.com/Light-4lamps-DL824-Fluorescent-Hydroponic/dp/B009GU4RMC?tag=greenrel-20

About ready to transplant to 1 gallon nursery pots. (easier to extract for re-potting than small cloth pots that tend to bulge)

Time to remove outer paper and transplant.

Consider this my good deed of the day and good luck. Let me know if you need any help.

In regard to the seeds. Some of our genetics are small (micro seeds) but, seem to propgate very well. Even lighter seeds always pop for me. I also believe that different strains have different color and depth in the shell, so I do not worry about how dark a seed is unless it fails over and over.

Peace, lw :slight_smile:

6 Likes

@latewood thanks for the detailed response. I will definitely go that route next time.

1 Like

Cool. That is great news. The best part about my method is that it is a
proven commercial method and pretty much fool proof. When you are ready;
I will give you more info on the actual prep of the cubes, etc. :slight_smile:

Happy growing

1 Like

I don’t know why I found that so amusing @Bogleg I know it’s not funny since you’re having trouble.

Welcome to the forum @chief78. Latewood touched on what I was thinking which was too much handling. I don’t use the paper towel method because I’m always afraid the taproot will grow into the towel. It’s my own brand of paranoia as many people use that method fine. I used the same rock wool for my clones and it never occurred to me to put my seeds in there (duh!). I may go that route next time as it looks super easy and like it gives you much more control.

2 Likes

@AnneBonny yes, I was scared of the whole paper towel but so many people suggest it. My thinking was that that’d do well in the peat pods and I wouldn’t be handling them as much, but they were difficult to keep just the right amount of moisture. @latewood method definitely seems the most efficient. Also, in case I came off wrong, I am totally satisfied with the seeds. If anything, I was highlighting my ignorance. I take full responsibility for the ones that didn’t make it. Incidentally, one of the ones I’d given up on did sprout out, but is kinda deformed. I’m just leaving it up in the dome to see what happens. I dont really want 4 in that little short tent. The two seedlings are doing great, the big girl is as well. Did some light lst bending to try to get the lower side branches to develop some and make her short and bushy.

2 Likes

I have a ton of piks showing successful seed starts in rockwool. There is a myth that because rockwool is inert, and is neutral ph of 7.0 in general that you have to worry about this. This is not true. (for future re:), When a plant starts; a neutral ph works just fine because, there is not roots to uptake nutrients at first, and once you have roots and apply a starter solution; In most cases the newest generation starter nutrients, or “organic” methods will rinse the rockwool at every watering event. So; When the roots protrude from the cube; They are no longer affected by the inert ph (neutral ph), of the rockwool. Hope you all under stand. :wink:

Once you get past this, and understand that rockwool is neutral and can fluctuate with the ph’d solution you provide; Irt all starts to make sense.

Another great thing about rockwool; is that it is…reusable.

Hope I do not have too many typpos…lw

2 Likes

Hi Everyone,
Just a small update. My big one SLH1 which is approx 2 weeks older than the other two is really branching out everywhere and looks really healthy. I’ve been bending her over with gardening wire for a couple days at a time; did once for each side to try to get some light to the lower branches and make them extend out some. She’s really bushy. Every node has two more branches coming out of it. After attempting to FIM last week on the 5th node, she’s on her 3rd node above that, but the main stem has been tied down one way or the other all week. I’m going to let her straighten up the next few days and just try to move the big leaves out of the way for the under branches. The main stem is really getting thick and the very bottom where it meets the soil is starting to get woody-like. I’ve given two small nutrient feedings at 1/4 strength on that one. Doing water, feed, water. Watering at ph 6.4 - 6.5. I plan on keeping it in the 1 gal one more week before transplanting to 5gal. I’m just taking pictures with shop light for natural light pictures and can’t seem to get a good angle on this one, so there are several.

The other two, SLH2 & SLH3 got transplanted today to their 1gal pots from the original 1pt seedling pots. They are just growing their 3rd set of leaves. Roots looked decent around the corners and bottom. They are just being given ph’d water.

These are currently at 24" from the light which seems fine for right now; not showing any signs of burn or stress, I’m really restricted by a short height. I really can’t raise it up any more. I can drop them down about another 22" by placing directly onto the floor which I plan to do as they get taller. The 24" is what the manufacturer recommends. I’ve included a pic of the light diagram.


@Hogmaster

Doing good for your first time keep it up @latewood do u close the tops on the cubes or put the seed in and hope for the best kinda thinking I just lost 2 seeds