My first hydro grow - Critical Orange Punch autoflower

Thanks for stopping in ILGM fam! This is my first time sharing about a grow and I’m excited to do so in this community that has been so welcoming and helpful for me! I hope this thread is helpful to someone, somewhere!

Background / Past Grow Experiences / About me
A little about me – I live in the northeast US in a fully legalized state. After becoming a homeowner in the 2010’s I did a couple outdoor grows. I’m privileged to have a private residence off a dirt road in a very rural area where theft is not a concern to me. After growing a few outdoor plants, I decided outdoor growing was not the best fit for me. Geographically, I’m very far north (basically Canada) and its not especially uncommon to see hard frosts or even snowfall in early/mid October. These learning experiences lead me to purchase the necessary equipment to grow indoors, largely for the appeal of being able to control the environment, but also to grow year round!

I did my first indoor grows using fabric pots and Roots Organic Formula 707 as a medium with Fox Farms “Grow Big” and “Tiger Bloom”. These grows went OK but I never felt like I got a great grasp on feeding schedule, knowing exactly what nutes my plants were taking up, and also manually feeding the plants didn’t mesh well with my lifestyle.

This lead me to research automated feeding systems and ultimately, as per-subject, decided to give hydro a try. I especially liked the appeal of being able to leave my plants unattended for a few days without having to ask a friend to make the trek to my house and check on them every day. While not specific to hydro, I like the “pureness” of a nutrient-less growing medium in that, I know more or less exactly what my plants are being fed!

I absolutely love DIY projects which was another appeal to hydro for me. I really enjoyed the research (there is always more to learn!) and designing / planning my setup. I already know and am excited about making changes for my next grow! Furthermore, I’m an avid automotive enthusiast and capable carpenter so I have plenty of tools and am experienced working with PVC and hose/tubing plumbing – all a great fit for hydro! If it weren’t so outrageously expensive and unnecessary, I’d love to incorporate some AN plumbing in a hydro setup somehow :sunglasses:

Alright! I think that’s enough back-story. On to the details of the grow!

Designing & Building my Hydro Setup (RDWC)
It probably goes without saying, but as my first hydro grow I’m sure there are some good ideas and not so good ideas of my design. I drew up this system using 5-ish gallon square buckets from Home Depot. The system features (2) grow sites with a central control bucket that houses the circulation pump. Arrows signify the direction of flow.

Here’s all (or at least, most) of the components ready to be assembled. Also, the fitment of this 2x4 tent in this closet in my office is just :pinched_fingers: While small, the location is pretty ideal for me as the attic access panel is located in this closet. Since buying our home, I have not once entered the attic, so I decided to route the tent exhaust fan up there. I used a flange intended for dryer ducting and cut an appropriately sized hole in the wood access panel to receive the ducting. This has worked out great!!

After a quick trip to the Big Orange, I got right to work on assembling. I ordered some 2" PVC bulkheads off Amazon and already had the appropraite holesaws and a deburring tool for metal pipe, but it worked great on plastic too (no surprise). Here are some photos of the assembled system:

Additional equipment in there includes a (4) outlet air pump, a dehumidifier and humidifier, controlled by a digital controller (on the right), a mechanical timer for the lights (later switched to digital after the mechanical timer “stuck” on me), a mechanical timer for the exhaust fan (I incrementally increased the running time for the fan. In flowering, it is on 24/7) and a digital timer for the recirculation pump (bottom).

The manifold/trunk plumbing sits behind the buckets.

Each grow site has (1) large air stone with the central reservoir containing (2) air stones, along with the circulation pump. The pump pushes water out through the “tee” fitting and to each grow site. Each grow site is connected to the main reservoir with an elbow fitting and small piece of vertical pipe that I figured would help ensure the water level in the grow sites did not stay too high for too long. In hindsight, this was unnecessary.

I don’t have a great photo of this, so forgive the screencap of a video. In the photo, the central control bucket is on the left and a grow site is on the right. This shows the plumbing for the pump as well as the vertical pipe in the grow site which, again, I feel is unnecessary and thus will remove next grow:

I’ll conclude this section with an equipment summary. I purchased everything from Amazon or my local grow shop.

Equipment Summary

  • Tent: Vivosun 24x48x60
  • Lights: (2) Spider Farmer SF-1000 (controlled by digital timer)
  • Ventilation Fan: Vivosun 4 Inch 195 CFM Inline Duct Ventilation Fan
  • Ventilation Fan Filter: Vivosun 4 Inch Air Carbon Filter
  • Circulation Fans: (2) Comfort Zone CZ6C 6-Inch 2-Speed Clip-On Fan
  • Air pump: Hydrofarm AAPA15L
  • Air Stones: (4) Pawfly 4" Aquarium Air Stones (2 in control bucket, 1 in each grow site)
  • Recirc pump: BARST 290GPH submersible pump
  • Humidity Controller: Inkbird Humidity Controller IHC200 Humidistat
  • Humidifier: LEVOIT 3L Top-Fill Humidifier
  • Dehumidifier: Pohl Schmitt 17oz Dehumidifier
  • RH Monitoring Govee Wifi/Bluetooth Digital RH monitor
  • Water Temperature Reading AQUANEAT Submersible digital thermometer

And here’s what I’m using for grow sites / medium / nutes

Grow Site / Nutrient Details

  • Containers: CENTREX 5 Gallon Square Buckets
  • Medium: Expanded clay pellets (hydroton)
  • Water Volume About 30 Liters when full
  • Veg Nutrients Advance Nutrient “Base” pH Perfect Trio (Micro/Grow/Bloom)
  • Flowering Nutrients Same as veg + Bud Candy, Big Bud and Overdrive (last 2 weeks)

And finally, the strain I’m growing! I purchased seeds from my local store and they are labeled “Critical Punch” and are an autoflower. I couldn’t find an exact match to this online, so I’m guessing it is really “Critical Orange Punch”. From an online description of this strain:

Auto Critical Orange Punch is an autoflower with a solid XXL yield. Even for the novice grower it is possible to achieve very high yields with this autoflower.

Sounds good to me :sunglasses:

The Grow
I planted my seeds in rockwool cubes on March 16th and put them in a humidity dome. I soaked the rockwool cubes in warm water and squeeze them out prior to planting the seeds. After 4 days, they both sprouted:


Photo Date: March 20th, 2023

I transplanted into the hydro system as soon as I had a healthy tap root, just 3 days after the last photo. This worked out pretty well. The other seedling didnt make it, but that ended up being OK as I ran out of space later on


Photo Date: March 23rd, 2023

At this point, I had the nutrient solution at 1/4" strength and would occassionally top-feed the plants via syringe after extracting some solution from the control bucket. Within a week, the plant started showing some healthy growth


Photo Date: April 1st, 2023 - Veg week 2

I followed AN’s recommendations for nutrient concentration and gradually increased the ratio as the plant grew. By 4/20 I had a really happy and healthy lookin girl!


Photo Date: April 20th, 2023 - Veg Week 4

Only a few days later, I saw my first tiny white pistils, indicating the auto was moving into flower. The growth in this week was considerable!


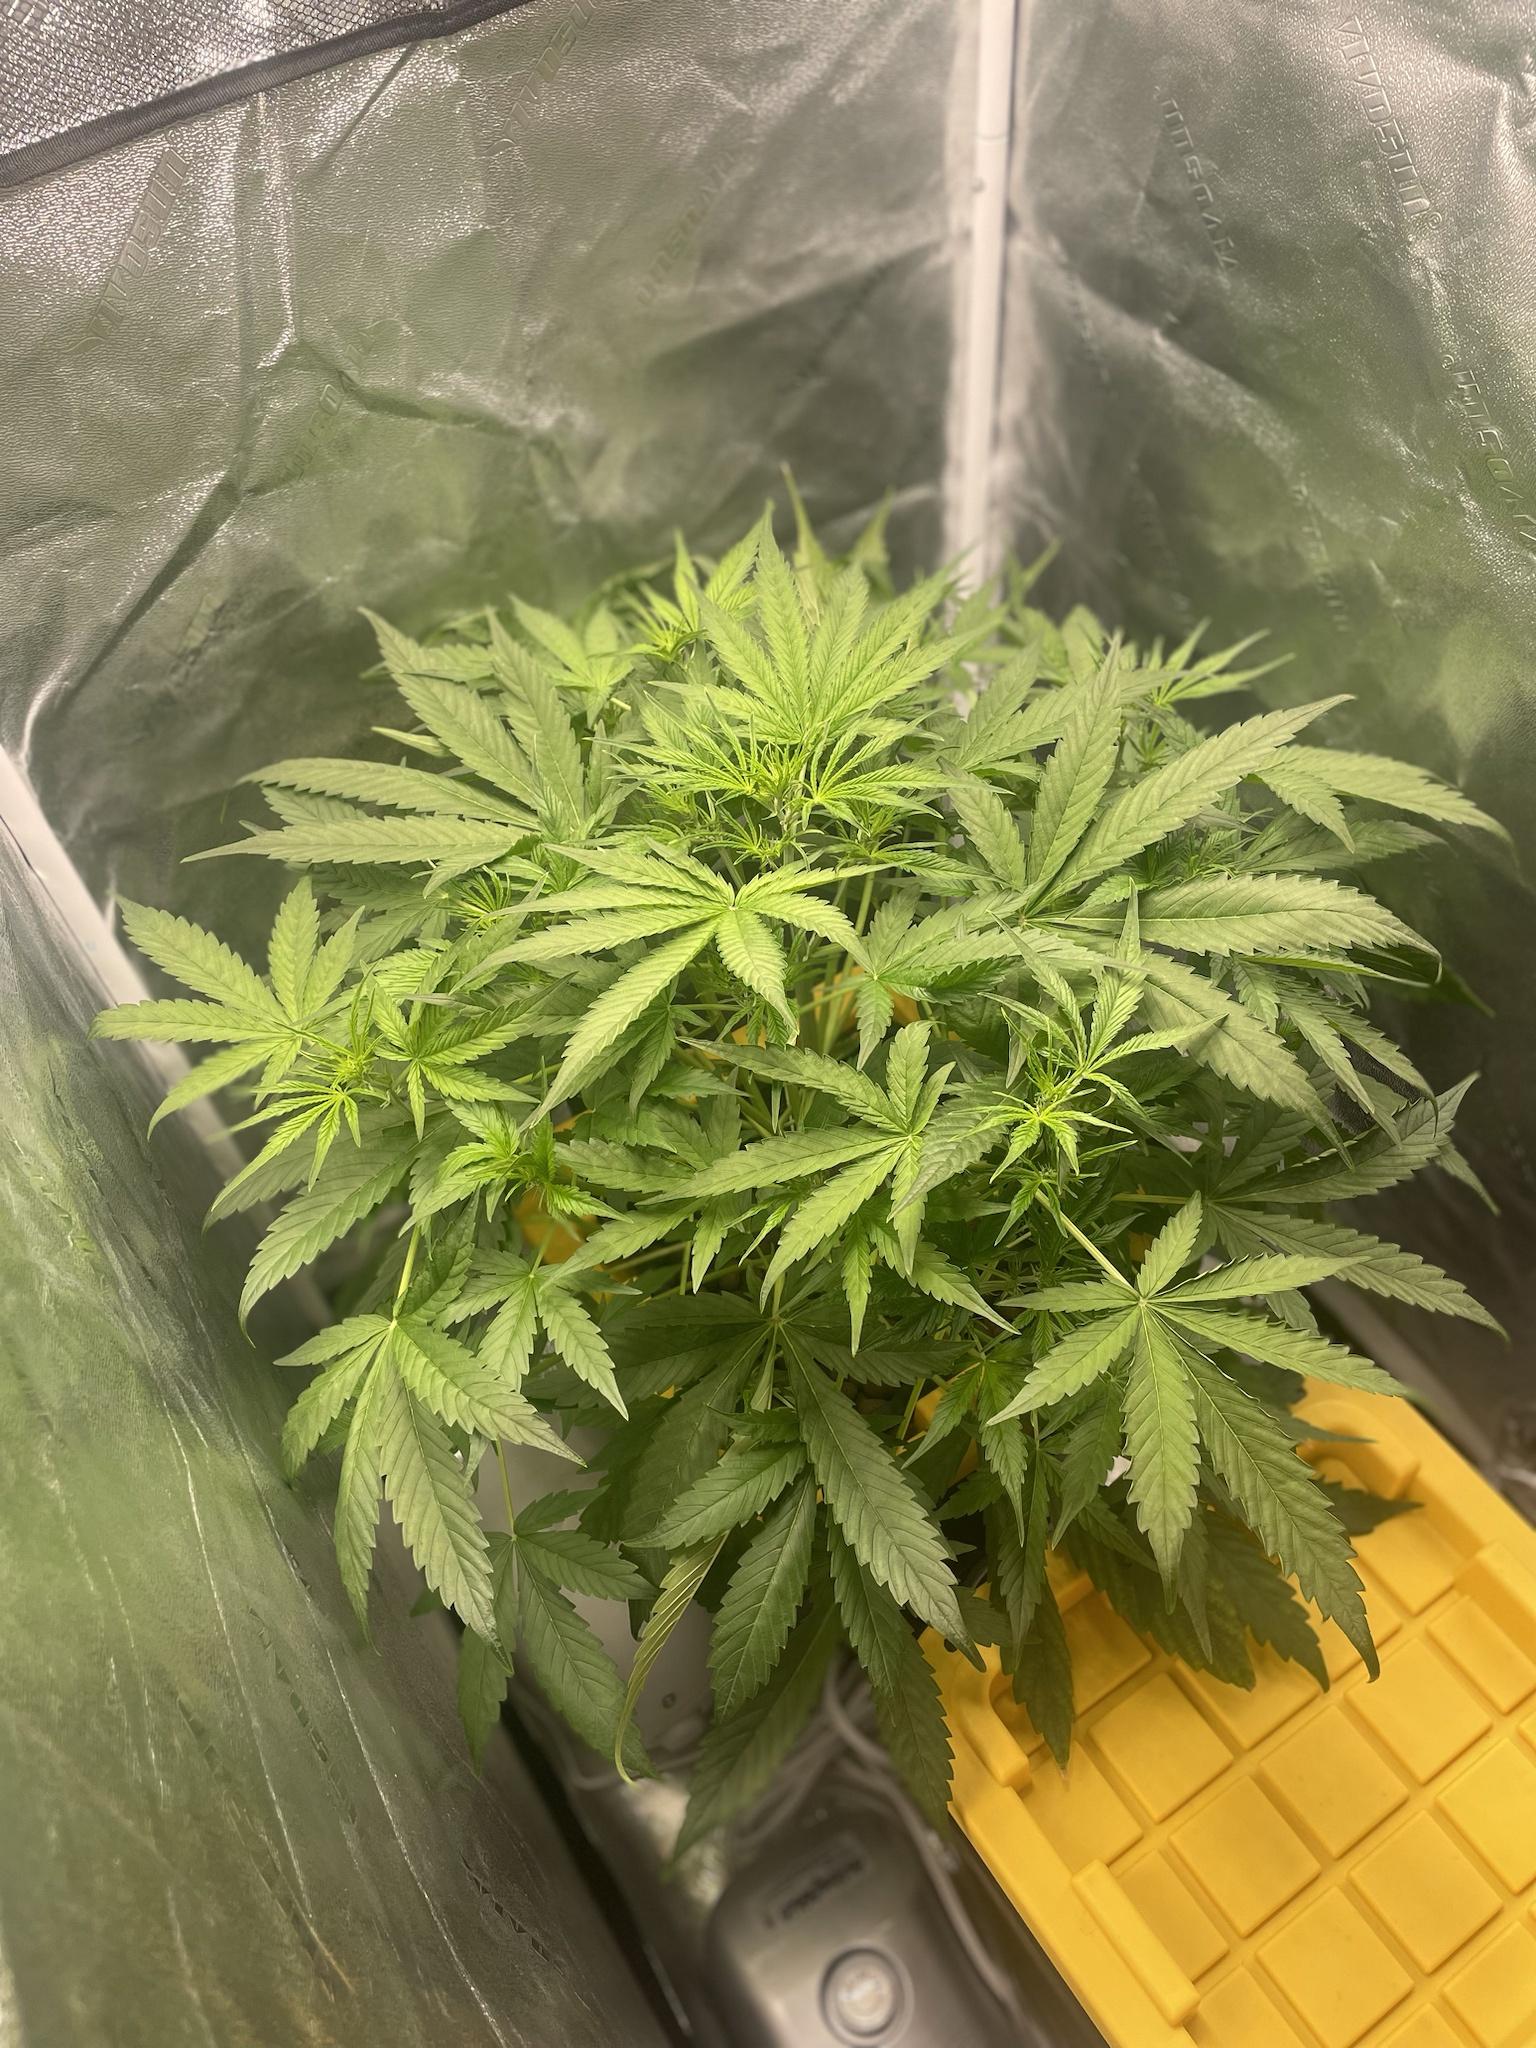
Photo Date: April 26th, 2023 - “Pre Flower” / Flowering Week 1, Day 2

Growth REALLY exploded at this point. In hindsight, I should have done some LST to achieve a more even canopy / less bushy plant. I intend to do this next go-around in a SCROG grow.


Photo Date: May 10th, 2023 - Flowering Week 3, Day 2

Around this time is when I discovered ILGM and asked my first question about defoliating an auto during flower. I got some super great and helpful advice, and decided to do some light defoliation, tucking and added some netting which was a precarious process at this point in the grow. Since I was not using the right-most grow site and the central bucket was becoming difficult to access, I decided to use the right-most bucket for checking water level and topping off nutrients. I’ve not done a single drain/refill which I understand is not ideal. My next hydro setup will incorporate drain system to evacuate the nutrient solution via garden hose to the bath tub down the hallway from this room


Photo Date: May 16th, 2023 - Flowering Week 4, Day 1

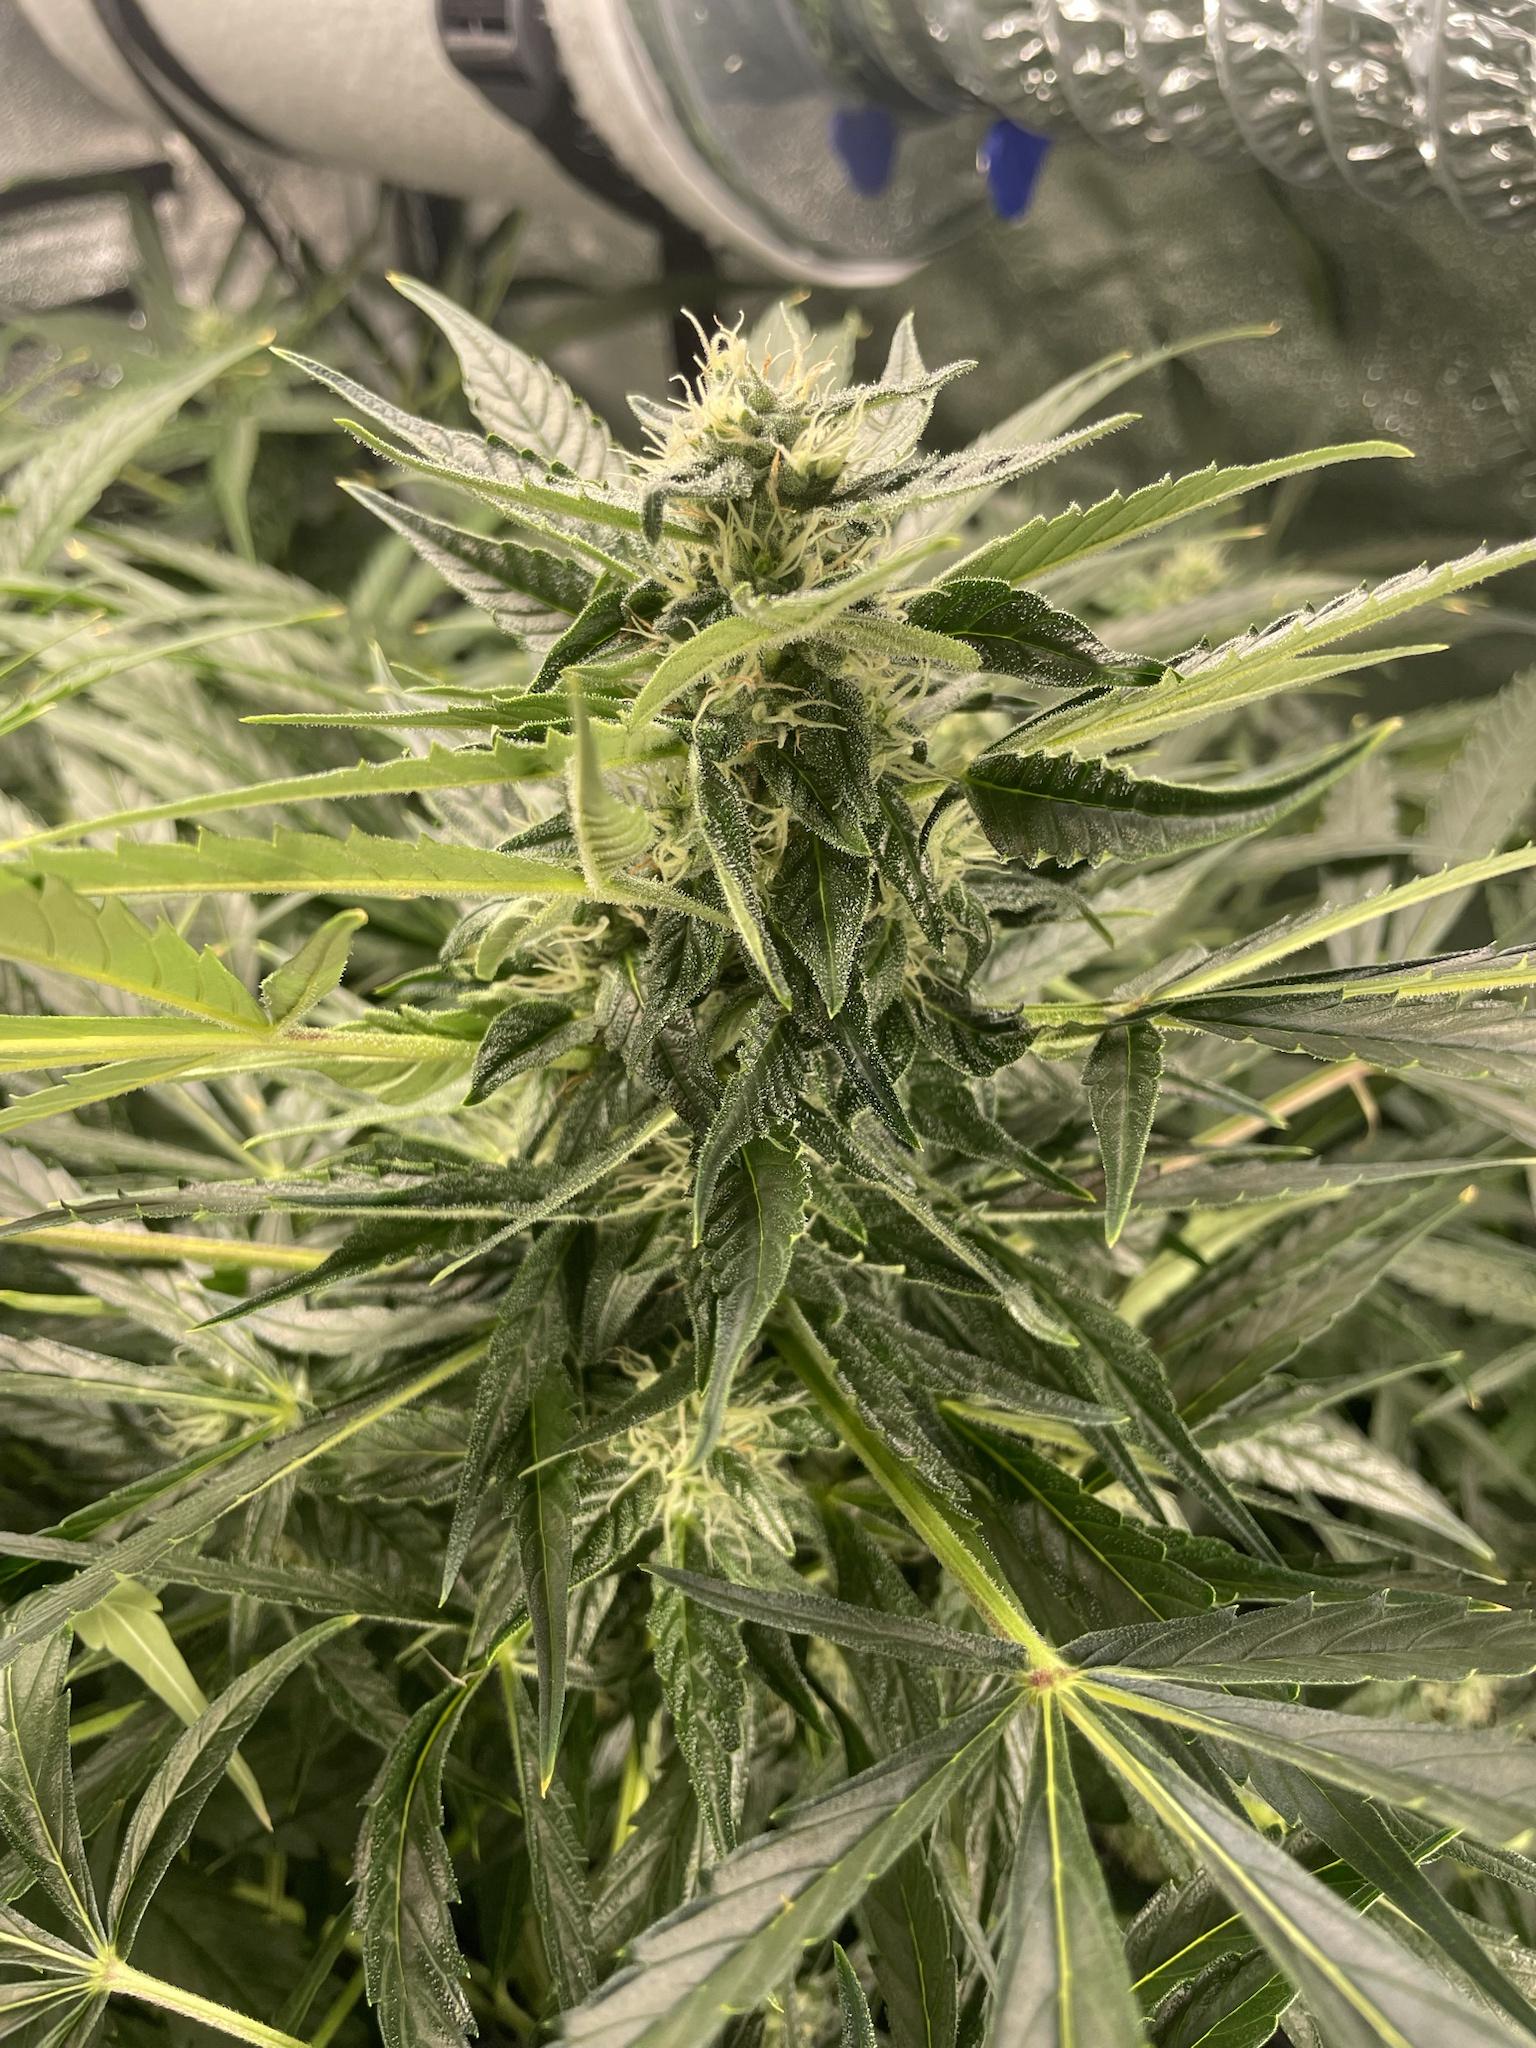
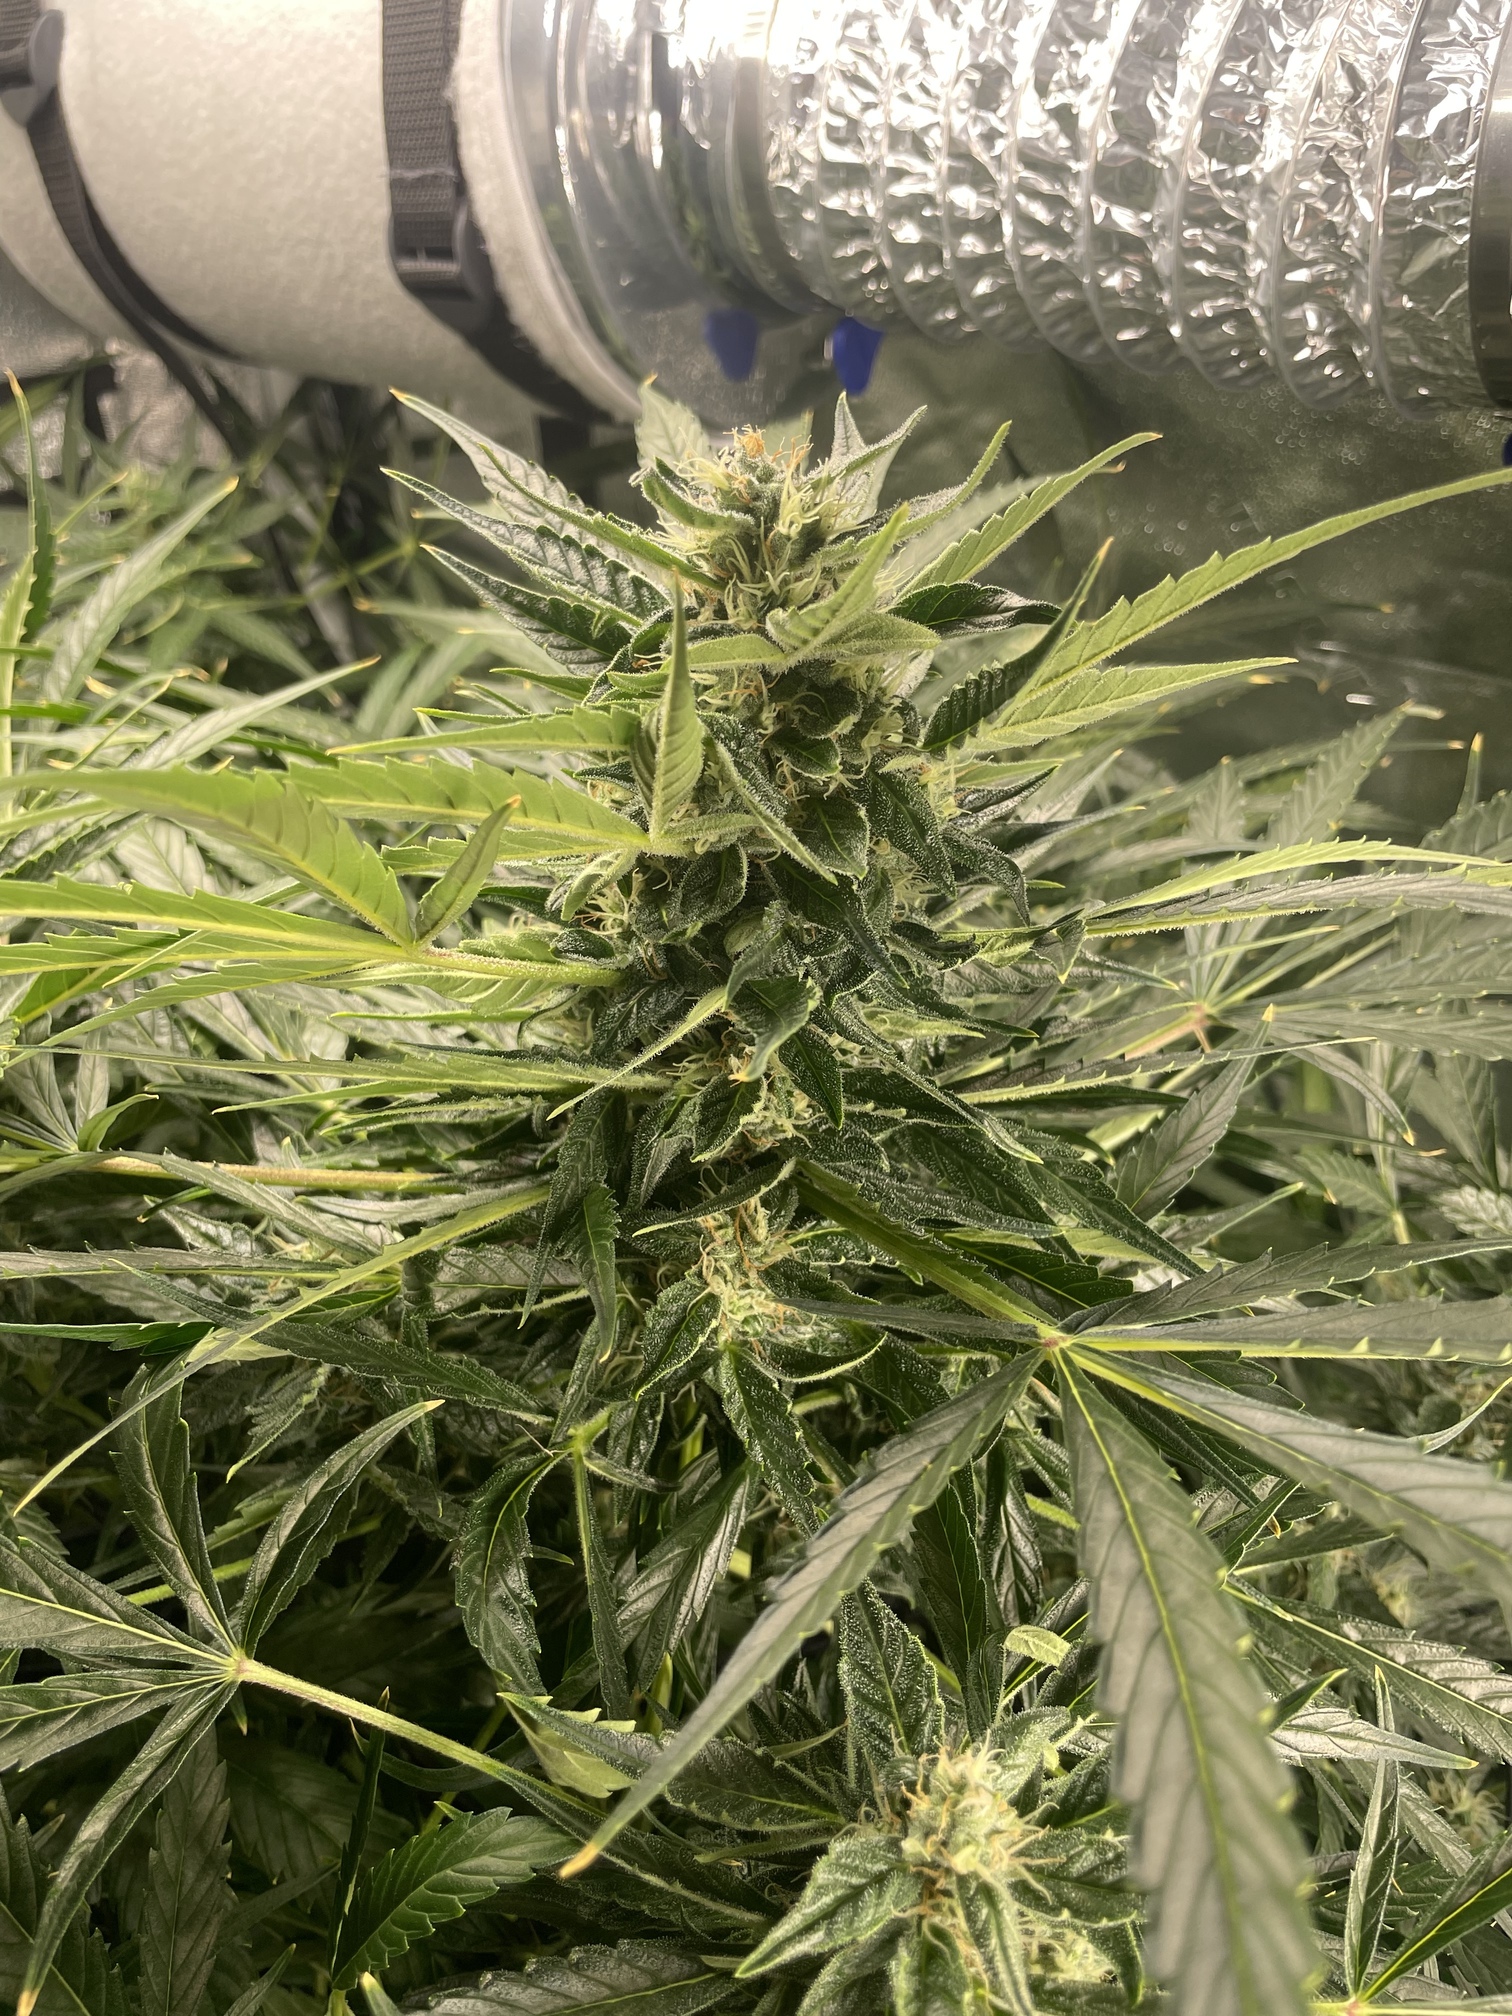
Here’s how my buds are looking as of last night – she still has a ways to go! If you click to enlarge the image, you can see some nice looking trichromes forming on the leaves around the bud. This has me feeling optimistic about what the coming weeks will bring!

I’m estimating a harvest date of June 21st, but will be inspecting trichromes with a microscope as I’ve done in past grows in order to determine the exact harvest date.

I’ll do my best to keep this thread updated. If you’re still here, thanks a ton for reading!

11 Likes

I’ll take this first reply to make a few notes about what I plan to do differently next time:

  • LST the plant to achieve a more even canopy
  • Build netting ahead of time and train the plant through it as it grows
  • Use small net baskets so the plant sits closer to the rim of the bucket
  • Fabricate platforms for each bucket to accomodate a bottom drain
  • Drain and refill the nutrient solution on some schedule (TBD - I’ve seen many opinions!)

Regarding water temperatures…
I’ve not had problems with water temps, which are generally upper 60’s or lower 70’s fahrenheit, but I think this is largely thanks to the current season where I simply leave the window of the room in which the tent resides cracked, letting in outside air that is generally around 40-60 degrees. However, I believe I will have temperature problems during a summer grow and juxtaposed to that, wouldn’t want to leave a window cracked during the winter, so I’m considering redesigning the system to relocate the reservoir / controller bucket outside of the grow tent to accomodate a chiller, or locate the chiller outside of the tent and run soft hoses in. I’ve never used a chiller before, so I need to educate myself more before I make a decision.

Overall, I see some immediate pros and cons to locating the reservoir / control bucket outside of the tent. I’ll keep pondering on it, but would love to hear some input from the ILGM community, especially if you’ve tried both ways!

3 Likes

I dont use hydroponics exactly, I am in an autopot setup. I put the rez outside the tent because the temp inside the tent is so warm. Anhow, I saw this instructional article about a DIY chiller like a week ago and thought Id pass it along to you. Almost like the universe knew Id be replying to this post… Because of forum rules I cant link you directly to the site but I believe that everything you need to google this article is included in this screenshot.


Congrats on a very successful run. Your plants look fantastic.

4 Likes

Thanks so much for the helpful resource, and DOUBLE thanks for the kind words!! I’ll definitely look into that DIY chiller, I love me a good DIY project :smiley:

5 Likes

These two things make this the best place to learn to grow on the entire internet

4 Likes

I couldn’t agree more!! :smiley: I love the positive atmosphere around here.

Quick update – I found the DIY guide and it makes total sense; it’s just a heat sink! I imagine copper tubing would be a lot more effective (albeit, a bit more expensive) than the 3/8 plastic tubing suggested by the article.

This got me thinking (and I’m sure I’m not the first to think of this)… I have some random all-aluminum radiators w/slim fans in my workshop from misc. car projects over the years… I wonder how one of those would perform assuming the ambient room temperature is < 70F (easy to accomplish). This could be marginally more efficient in size and energy requirements compared to a small refridgerator, with the added benefit of helping lower tent temperatures due to the necessity of keeping the ambient room temp < 70F.

Unsurprisingly, I’m finding a lot of content on this subject on YT, now that I know “its a thing”!

I’m super excited to apply what I’ve learned in this grow to my next run, but won’t let that excitement distract me from being diligent through the remainder of this grow :sunglasses:

3 Likes

You will want a chiller. It’s easy enough to run a 1/2” soft tube from the chiller into the inside of the tent. The chiller is, by far, the simplest addition to RDWC.

Plants look great, by the way.

3 Likes

Thank you @Graysin!! I actually ordered parts a chiller last night after a few days of babysitting solution temps with frozen water bottles :smiley: I’m going to try a DIY Peltier-effect thermocooler as I think this will be a fun little project for me. My water temps are far from “out of control” and my current system holds only about 30L therefore I’m optimistic about a small-ish chiller being able to achieve desired temps. Plus, I can easily add a second chiller and remain way under even the lowest cost chillers I found, which I’m less inclined to trust. Maybe this will end up being a “waste” of time/money, but I choose to view such outcomes as learning what doesnt work, rather than failure :slight_smile:

Regarding PPM and Water Quality
In addition to my chiller parts purchase, I also ordered a HydroLogic micro75 RO system. As I mentioned before, I haven’t done a single drain/refill and therefore it is no surprise that I’m seeing very high PPM, just over 2000. I’ve been “topping up” the system as-needed with nutrient solution I’m mixing in 1-gallon jugs I simply fill with tap water, which comes from our well. I do pH balance the solution after mixing nutrients (despite using AN’s “PH Perfect” products, I still find it to need small pH reduction) however, we have quite hard water. I cannot recall what I measured PPM to be, but needless to say it was well above zero! So, I’m sure that the lack of draining/refreshing combined with using “less than ideal” water has lead to this high PPM situation.

Solution
I ordered a small 110v transfer pump which accepts garden hose threads which I will use to drain my system as soon as possible. Since the RO system wont be here for a while, I will replace the nutrient solution (for the first time this grow cycle :grimacing:) this weekend using store-bought 5-gallon jugs of water instead of tap water. This should hold me over until the RO system arrives and I make time to install it. I’ll use my own RO water for the final week of flushing.

I plan to install the RO system in my workshop where I have very accessible PEX plumbing (run internally over the finished wall, not inside the wall) so I can plumb in a dedicated circuit for it. I’ll reuse the 5-gallon jugs to receive water from the RO system once I’ve plumbed it in. My objective is to always have a 5 gallon jug of RO/PHd nutrient solution in my office (where my tent is) to refill the reservoir between drain/refills, and another 5 gallon jug in my workshop collecting RO water.

Both of these things I hope to benefit my current grow, but I’m equally looking forward to, and have been planning, my next grow where I will apply what I’ve learned this go-around :slight_smile: My next grow will be RDWC again, with small changes. I will be using “waterfall style” recirculation, incorporate convenient draining, and move the control bucket outside of the tent. I’ll share my plans for this once I’m done and ask for feedback!

Plant Update
We just completed “Week 4” of the flowering cycle, which means we’re halfway through! Yay! Buds continue to grow in size and the plant continues to look healthy (I think) despite slight tip burning, likely due to the high PPM I mentioned before.

Here’s how she’s lookin as of this morning:

That’s all for today. Thanks for reading!

6 Likes

Good luck.

I did that once. It doesn’t work very well long-term (at least, it didn’t for me). I ran too much water through my system for the cooling side to keep up with the demand and the fans I used on the hot side didn’t disperse the heat well enough. It may have been a flaw in using cheap component parts, I’m not real certain.

Most definitely. More importantly, if the demand on the system is low (1-2°) then it likely won’t be a waste at all.

100% - this helps maintain water temps with the chiller style you’re about to test drive.

Most likely add 2-3 weeks to the estimate on flowering time the seed site gave. They’re frequently advertising “best case” flowering times, not real averages.

Everything still looks real happy! Keep it up

1 Like

Thanks for all the helpful advice and kind words, I really appreciate it!

I ordered parts to build a cooler with (2) 40mm peltier modules cooling an 80mm water block. The hot side will be cooled with (2) 120mm fans over a 140mmx260mm heat sink. Will that do the trick? Guess we’ll find out soon enough :smile: I’ll update this thread with my findings! I loooooove data logging and experimenting, maybe my favorite part of growing (well, except for the end results :partying_face:)

Most likely add 2-3 weeks to the estimate on flowering time the seed site gave. They’re frequently advertising “best case” flowering times, not real averages.

Thank you! That’s super helpful. The seed package says “70-80” days on it. I figured that meant seed-to-harvest given its an autoflower, but that seems very unlikely seeing where she’s at now. Coincidentally, today marks 70 days since germ. Safe to say, she definitely needs more time before becoming ready to harvest.

3 Likes

That’s the only way to know!

1 Like

System flush was a success!

I started by measuring PPM in my water and found it to be about 170 after sitting for 30 mins. Then I measured out 3L of tap water and added my nutes according to the guide on the bottle (4mL/L for base trio and 2mL/L for supplements). After mixing it all up, I found PPM to be about 1500. I found some other folks on the internet commenting about this, and the general consensus is to determine your target PPM and adjust ratios as needed to hit that. So that’s what I did!

In order to expedite the drain and refill, I prepared a 17gal tote in my bathtub and filled it up with water. I calculated that I filled it with about 15 gallons. I added nutes at 80% the recommended concentration, and PPM landed around 1200 as I hoped it would. I guess this may still be considered “a bit too spicy” but I will just monitor ppm in the system and add plain water if needed. Definitely an improvement over the previous ~2300 ppm!! :scream::scream:

For the actual draining and filling, I bought up a small 110v transfer pump on Amazon and used that to suck the nutrient solution out of the system and ran a short garden hose to the bathtub down the hall. I managed to get most of the nutrient solution out thanks to a big flat “suction adapter” that came with the pump. Then I simply reversed the process to fill, transferring water from the premixed solution in the tote and into my system. Overall this process went super smoothly and I wish I had done it earlier in the grow as per general guidance. You live and you learn! Next grow I’ll do it better :raised_hands:

I measured PPM this morning and it was around 1350ppm, maybe a consequence of not being able to drain the system 100%. I’ll be topping off with plain PH water until PPM settles down to 1100-1200.

As for the buds they continue to get more orange hairs daily. I haven’t looked at the trics under a microscope but I’m guessing they have a number of weeks to go before being ready to harvest.

Hope everyone has a safe and fun Memorial Day. Thank you to all those who have served!

2 Likes

I picked up a ton of stuff from a guy off Craigslist when all I was after was a tent! Tent $75 or everything else $120 if I carried it up from his mother’s basement (no lie).

After reading through this thread I realized included there was a complete hydro system that has been sitting in the garage. I will have to put on my list to try once home improvement projects are completed.

2 Likes

That’s a great deal! I say give it a go! However in my experience, home improvement projects are never truly finished! :stuck_out_tongue_closed_eyes:

1 Like

Today marks the first day of Week 6 of the flower cycle. The plant “plumped up” a bit from last week and seems to be happy and healthy.

Sorry I didn’t unzip the tent all the way, I was in a hurry

And a bud close up :sunglasses:

The plant is definitely too tall for the 60" tent and we can see a bit of light burn. My next grow will be a photoperiod and I will try to train it so it doesn’t grow quite as tall :slight_smile:

2 Likes

I’ve been topping off with just PH water @ 5.8 and monitoring PPM, which seems to slowly climb despite topping off with only PH water. My understanding is that I want to see PPM staying consistent, meaning the plant is consuming equal amounts water and nutrients. Since PPM is slowly climbing, the plant seems to be consuming slightly more water than nutrient solution, suggesting the nutrient solution is too concentrated.

I don’t think that evaporation is the cause of this phenomenon. Over the last week, temperature in the tent has averaged 73.5F and RH has averaged 53.1% (I’d like to see this under 50%, so may need to add a dehumidifier to the room in which the tent resides…). We’ve had beautiful weather here i.e., hot, sunny days. I’ve been adding 2 or 3 frozen water bottles every morning before I leave for work in order to keep water temps in check. I don’t log those, but I haven’t witnessed them above 75F when I get home and immediately check. The final parts I need to assemble my chiller arrive today, so that is high on my priority list as I’ve quickly grown tired of the frozen water bottle routine (though grateful that it works so effectively!)

Back to PPM… I plan to do another drain/refill in the next 10 days. Last time, I filled with new nutrient solution measuring around 1000ppm. Before my next drain/refill, I will lower the concentration of the new solution to around 900ppm and hope to see the PPM of the solution in the system remain more consistent.

Here is a (smaller) bud shot from this morning. My original estimated target harvest date was 6/21 but its looking like it will be a bit later:

I have a small handheld microscope I’ve used for past grows where I snipped off a small piece of sugar leaf to inspect the trichromes. I think I’ll pick up a USB microscope in hopes of not having to snip off a leaf and get some cool pics!

2 Likes

@john818 Found it… Following!

1 Like

Thanks again for your help @Growmoredank, and thanks for following along!!

Following the input in my “help” thread, I plan to do another drain/flush this weekend at ~1000ppm and significantly reducing the bloom supplements. With only a few weeks expected to be left in the flowering cycle, I want to keep her nice and happy!

Just got back from the big orange hardware store and picked up some PVC in preparation of my next grow :slight_smile: I picked up some 3/4" ball valves, elbows and a slip-to-pipe thread adapters. They only stock FIP bulkheads and I like slip joints better so I ordered some 3/4" slip bulkheads onnline. My plan is to incorporate these all as a bottom drain in each of the totes that will make up this new system. When I’m ready to drain, simply connect the transfer pump via garden hose, open the ball valve and sit back :sunglasses:

I was debating switching to a 2x3 tent so I could more easily plumb to the external reservoir, but I think I have a solution to make my 2x4 tenat work. Due to how snuggly it fits in the closet in which it resides, there is no path for plumbing the 2" return pipe to the external reservoir. To address that, I will fabricate a “bulkhead plate” out of 1/8" aluminum, rivet it to the tent material as a semi-permanent fixture, and cut out holes in the exposed tent fabric to accept a 2" slip bulkhead (along with other bulkheads for supply and any other stuff to pass into the tent. This will ensure no light leakes while providing a secure means of passing the PVC into the tent. Now I just have to decide if I want to fabricate it by hand or draw it up and CAD and have it cut and anodized by SendCutSend :thinking:

Have a fun and safe weekend everyone :smiley:

2 Likes

Happy Monday ILGM fam - I hope you all had a lovely weekend. Here in northern VT we had some beautiful weather, sunny and mid 60’s, so my wife and I spent the weekend choring outdoors. Lots of mowing, string trimming and some chainsawing, fun :slight_smile: I’ve been hanging OSB in our detached garage and hung the last piece on Saturday morning and cleaned up all the sawdust and leftover cuts from the 38 sheets I went through!! Feels good to have reached a milestone on that project. Next up is painting :face_exhaling:

Nothing too exciting happening with my grow. I’ve been carefully monitoring the health of some leaves that started showing some negative symptoms, especially this one:

I created a thread asking for input on this, and to no surprise received some much appreciated input from the community (shoutout to @MidwestGuy and @Growmoredank!). Before taking any action however, I decided to reach out to AN support as I’ve read many good things about that aspect of the company and figured I’d give it a shot. Fortunately the symptoms have not escalated very much, with only one other leaf I’ve found starting to show some orange dots, but not nearly to the extent of the leaf in the photo. That one has worsened, but I’m optimistic about the situation overall due to the fact that the vast majority of the leaves are not presenting these symptoms. I certainly do not want to make any major adjustments without fully understanding the cause, and being certain as possible that its not just a consequence triggered by my very high PPMs a couple weeks ago.

AN responded very quickly Friday afternoon following my initial email with a set of questions. I just got back to them this morning with answers, and I’ll keep this thread updated with any conclusions from that conversation / actions I take with my plant.

Otherwise, I’ve been daydreaming here and there about my next run, as I’ve mentioned a few times by now. I just stumbled across a post which gave me a lot of inspiration and ideas for a 2x4 RDWC grow. It has me thinking about using similar bucket sizes instead of the (2) 17gallon totes I’ve been leaning towards. Here is a link to that awesome post for any future 2x4 RDWC setups looking for inspiration: Rdwc hydroponic setup with water chiller - #15 by Ak723

I’ll upload some new pics later this week. Tuesday marks the start of Week 7 of flower, exciting! I ordered a USB Microscope in hopes of getting some nice bud shots, and hopefully it can see trichromes well enough to better determine a harvest date. Otherwise, I’ll fall back on my handheld microscope I’ve used before.

2 Likes

I missed the “edit” window, but forgot to mention one th ing – I understand the darker color of the leaves may be an indiciation of too much nitrogen. I’ll have to look back on my photos, but this may coincide with the introduction of AN’s “Overdrive” which is a 1-5-4. I think a fresh nutrient solution is a must for me this week, as I may have erroneously “overlapped” some nutes.

1 Like